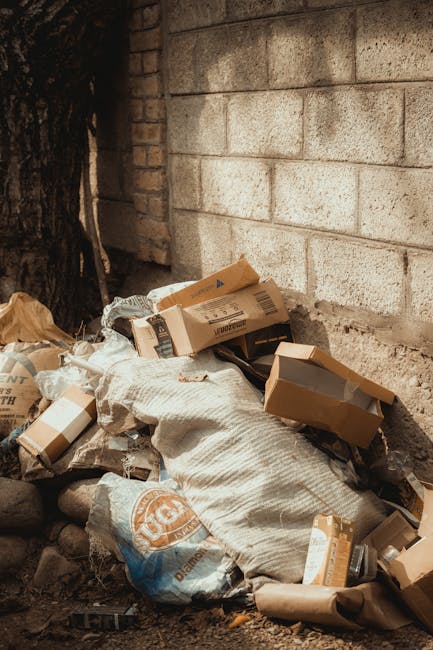
Common DIY Rubbish Removal Mistakes That Cost You More
DIY rubbish removal can look like the cheapest option on a Saturday morning. You load a few bags, borrow a mate's van, and feel quite pleased with yourself. Then the hidden costs start creeping in: extra fuel, multiple trips, disposal fees, damaged furniture, a sore back, maybe even a fine if the waste is handled badly. That is the real problem with Common DIY Rubbish Removal Mistakes That Cost You More - the price is rarely just the price.
This guide breaks down the most expensive mistakes people make when clearing waste themselves, why they happen, and how to avoid them without making the whole job more complicated than it needs to be. Whether you are clearing a loft, a garage, a flat, or old garden waste after a messy weekend, a bit of planning can save a surprising amount of money. Sometimes the difference is simply knowing what not to do.
Table of Contents
- Why Common DIY Rubbish Removal Mistakes That Cost You More Matters
- How Common DIY Rubbish Removal Mistakes That Cost You More Works
- Key Benefits and Practical Advantages
- Who This Is For and When It Makes Sense
- Step-by-Step Guidance
- Expert Tips for Better Results
- Common Mistakes to Avoid
- Tools, Resources and Recommendations
- Law, Compliance, Standards, or Best Practice
- Options, Methods, or Comparison Table
- Case Study or Real-World Example
- Practical Checklist
- Conclusion
- Frequently Asked Questions
Why Common DIY Rubbish Removal Mistakes That Cost You More Matters
Rubbish clearance looks straightforward until the waste starts stacking up in the hallway, driveway, or back garden. A few wrong decisions can turn a simple clear-out into a longer, more expensive, and more stressful job. That matters because waste removal is not just about moving items from A to B. It also involves sorting, lifting, transport, disposal, recycling, and, in many cases, compliance with local rules.
The biggest surprise for many people is that the cheapest-looking approach often becomes the most expensive once you include hidden time costs. Two trips instead of one, underestimated van hire, damaged items that could have been resold, or a pile of mixed waste that ends up costing more to dispose of. You will notice this most clearly on larger jobs - a house clearance, garage clearance, or old furniture removal can swallow an afternoon before you even get to the tip.
There is also the safety side. Heavy mattresses, broken glass, old appliances, and building rubble are awkward at the best of times. A rushed lift on a wet pavement or a poorly packed van can lead to injuries, damage, or both. Let's face it, nobody wants to spend Sunday evening with a twisted wrist because a sofa corner slipped on the stairs.
Expert summary: DIY rubbish removal only saves money when you plan accurately, separate waste properly, use the right vehicle or collection method, and understand what can and cannot be taken to a disposal point.
How Common DIY Rubbish Removal Mistakes That Cost You More Works
At a basic level, DIY rubbish removal works by collecting, sorting, loading, transporting, and disposing of waste yourself rather than paying someone else to handle it. That sounds simple. The complications appear in the detail.
Most cost overruns happen in one of four places:
- Planning - not estimating volume, weight, or waste type properly.
- Collection - not having the right bags, boxes, gloves, or tools.
- Transport - using a car or van that is too small or unsafe for the load.
- Disposal - taking the wrong materials to the wrong place, or paying more because the load is mixed.
A common example is a house clearance where someone starts with mixed rubbish, broken furniture, old clothes, a fridge, and garden cuttings all in one pile. By the time they get to the disposal site, they discover the load needs separating. That means more labour, more trips, and often higher fees. A better approach is to sort it at source into categories such as general waste, recyclable items, bulky waste, and special items like appliances.
Another example is timing. If you leave the job until the weekend, you may find yourself queueing, paying for extra parking, or rushing because the site closes earlier than you expected. It's a small detail, but small details have a habit of becoming expensive ones.
Key Benefits and Practical Advantages
Done properly, DIY rubbish removal can still be a smart and economical choice. The key is not to romanticise it. It is physical work, and it rewards preparation far more than enthusiasm.
The practical advantages are clear:
- Lower direct spend if you have a small amount of waste and already own suitable transport.
- More control over sorting items for reuse, recycling, or donation.
- Flexible timing if you need to clear a room bit by bit rather than all at once.
- Useful for minor jobs such as a few bags of loft clutter, light garden waste, or a single bulky item.
- Better awareness of what you own, which helps when clearing a property more efficiently.
There is also a quieter benefit: you often become much better at spotting what can be reused, sold, or recycled. A half-decent wooden shelf, a usable chair, or an old bike may not be rubbish at all. And if you are clearing after a move, a renovation, or a probate arrangement, that kind of clarity helps. It can take a bit of the emotional sting out of an otherwise messy task.
For larger jobs, though, the advantage often shifts away from DIY. Once waste becomes bulky, heavy, or mixed, professional help can be more economical than a string of small mistakes. That is especially true when you compare the total cost of your time, transport, parking, and disposal.
Who This Is For and When It Makes Sense
DIY rubbish removal makes the most sense for people with a manageable amount of waste, safe lifting capability, and access to the right disposal route. It can suit homeowners clearing a shed, tenants leaving a property tidy, landlords managing a light refresh, or families dealing with a small domestic clear-out.
It is often reasonable when:
- the load is light and well separated,
- you have time to sort and transport it safely,
- there are no hazardous items involved,
- you are not dealing with large furniture or white goods,
- you know where the waste can legally go.
It is less suitable when the job involves awkward stairs, limited parking, damp or bulky items, or several waste streams mixed together. A flat clearance in London, for example, can quickly become more complex than it first appears. Tight entrances, traffic, and restricted kerbside access all add friction.
If your job is edging beyond "a few bags and a table lamp," pause and assess it properly. A bit of honesty here saves money later. Truth be told, most expensive DIY clearance mistakes start with the phrase, "It'll only take an hour."
Step-by-Step Guidance
Here is a practical way to approach rubbish removal without wasting effort or money.
1. Identify the waste type
Separate general rubbish from bulky items, recyclables, green waste, electricals, and anything that may need specialist handling. Old fridges, mattresses, and certain construction materials often need different disposal routes.
2. Estimate the volume properly
People nearly always underestimate volume. A small pile in the corner can turn into a van-full once it is broken down and bagged. Measure the space visually, and if possible, stack waste in one place first so you can see the scale.
3. Check access and loading conditions
Think about stairs, lifts, narrow hallways, parking, weather, and the distance from your property to the vehicle. On a wet evening, a long carry across paving slabs is far more awkward than it looks in daylight.
4. Choose the right disposal route
For light, approved waste, a local disposal point or council collection may be enough. For larger, mixed, or awkward loads, a specialist rubbish removal service or bulk waste collection is often easier and sometimes cheaper once everything is added up.
5. Pack and load safely
Use sturdy bags, gloves, and, if needed, a sack trolley or straps. Load heavier items low down and secure them so nothing shifts in transit. A van full of loose rubble and wobbling furniture is a bad idea - and a noisy one too.
6. Dispose of everything correctly
Follow the rules for the facility or collection method you are using. Keep proof of where the waste went if you are managing a property, business, or shared building. That paper trail can matter more than people think.
7. Review what could have been done differently
After the job, note what took the longest or cost the most. That reflection pays off on the next clear-out, especially if you regularly deal with garden waste, loft clutter, or large-item collection.
Expert Tips for Better Results
In our experience, the biggest savings come from small, disciplined habits rather than heroic lifting sessions.
- Sort before you move anything. Once rubbish is mixed, disposal gets slower and usually more expensive.
- Break bulky items down where safe to do so. A flat-pack wardrobe takes less space dismantled than upright, obviously, but people still overlook this.
- Keep one "maybe" pile. Items you might sell, donate, or repair should stay separate until you are sure.
- Use the right containers. Strong bags, boxes, and protective wrap reduce breakages and spills.
- Don't overload the vehicle. A packed car boot is not the same as a safe load.
- Plan for the awkward item first. If the sofa will not fit through the hallway, find that out before you move the rest of the room.
- Watch your timing. Early starts are often better than late ones, especially if you need parking or queue-free access.
One more practical point: if there are sentimental items, deal with them separately. Clearing waste and clearing memories are not the same job. It sounds obvious, but in a house clear-out, those two things can blur together very quickly.
Common Mistakes to Avoid
This is where the money tends to leak out. Some of these mistakes are small on their own, but together they can double the cost of a DIY clearance.
1. Underestimating the load
The most common mistake is simply thinking there is less rubbish than there really is. Bags fill quickly. Furniture takes up more room than expected. Loose waste becomes awkward once compressed into a vehicle.
2. Mixing all waste together
Mixed loads are harder to sort and may cost more to dispose of. Recyclable material, green waste, wood, appliances, and general rubbish should not all be treated the same way if you can avoid it.
3. Using the wrong vehicle
A small hatchback is fine for a few bags. It is not fine for a mattress, dismantled wardrobe, and a stack of broken shelving. When the load does not fit, people end up making repeat journeys or risking unsafe packing.
4. Forgetting disposal fees and time costs
The obvious cost is fuel. The less obvious costs are parking, site charges, and the time spent loading, unloading, and queueing. A "cheap" job can become a day-long chore very quickly.
5. Ignoring safety gear
Gloves, boots, eye protection, and a trolley are not overkill if the waste is sharp, dusty, or heavy. A single cut hand can derail the whole plan.
6. Taking restricted items without checking
Some items need specialist disposal. Fridges, mattresses, electrical items, chemicals, and certain construction waste can't always be handled like standard rubbish.
7. Failing to clear access first
It sounds minor, but blocked hallways, parked cars, garden clutter, or locked gates can make the job drag on. Clearing the route first often saves more time than wrestling with the waste itself.
8. Leaving it too late
When waste sits around for weeks, it can get wetter, smellier, heavier, and more awkward to move. Garden waste rots. Damp cardboard collapses. And nobody wants to carry that stuff twice.
Tools, Resources and Recommendations
You do not need a warehouse of equipment, but the right basics make DIY rubbish removal much safer and less wasteful.
- Heavy-duty rubbish sacks for general waste and smaller bulky items.
- Work gloves with a decent grip for rough or sharp materials.
- Sack trolley or wheelbarrow for longer carries or heavier loads.
- Ratchet straps or tie-downs to secure loads in a vehicle.
- Dust masks and eye protection when dealing with dusty lofts, old insulation, or broken materials.
- Blankets or wrap to protect furniture and reduce damage in transit.
- Markers and labels to separate waste categories before loading.
For some jobs, the best "resource" is not a tool at all but a better service match. For example, a large item collection can be far more efficient than trying to squeeze a sofa into a small vehicle. Similarly, if the waste is mixed or heavy, a bulk waste collection may be more practical than a long day of self-hauling.
If the task involves specific items, the specialist route matters. A mattress disposal page or a dedicated fridge disposal service can be useful when standard rubbish handling is not appropriate. That is often where DIY starts getting fiddly, and fiddly is rarely cheap.
For a broader overview of service options, it can help to review rubbish removal and waste clearance pages before deciding whether to handle the work yourself.
Law, Compliance, Standards, or Best Practice
Waste disposal in the UK should be handled carefully. You do not need to become a legal expert to clear a shed, but you do need to avoid careless disposal. The broad rule is simple: make sure your waste goes to a legitimate, appropriate place and that it is handled responsibly.
Best practice usually includes the following:
- only giving waste to a properly authorised collector or disposal route,
- keeping records where appropriate, especially for business or property-related clearances,
- separating recyclable material where practical,
- treating electricals, appliances, and hazardous items with extra care,
- avoiding fly-tipping, even accidentally, by checking where waste will end up.
If you are clearing a rented property, a probate home, or premises used for business, documentation becomes more important. In those cases, good practice includes using a reputable service and understanding what is being removed. For business users, pages like business waste removal and commercial waste collection may be more appropriate than a DIY approach.
Health and safety matters too. Heavy lifting, sharp edges, dust, and awkward spaces can all create avoidable risk. If a job looks unsafe, it probably is. That is not being dramatic - just realistic.
Options, Methods, or Comparison Table
Here is a straightforward comparison of the most common rubbish removal approaches. The right choice depends on volume, access, waste type, and how much time you want to spend on it.
| Method | Best for | Pros | Drawbacks |
|---|---|---|---|
| DIY with personal vehicle | Small amounts of light waste | Low direct cost, flexible timing | Limited capacity, more trips, higher risk of errors |
| DIY with hired van | Moderate domestic clear-outs | More space, better for bulky items | Hire cost, fuel, loading effort, time pressure |
| Council or local collection route | Specific approved items or smaller loads | Convenient for certain waste streams | May involve waiting, restrictions, or item limits |
| Specialist rubbish removal service | Bulky, mixed, or time-sensitive clearances | Less physical effort, faster, often more efficient overall | Direct cost can be higher on paper |
The important thing is not just comparing the sticker price. Compare the whole job. If your DIY option needs two trips, a van hire, and a Saturday gone, it might not be the bargain it first looked like.
Case Study or Real-World Example
A fairly typical scenario goes like this. A homeowner clears a spare room before guests arrive. The plan is simple: old chest of drawers, a broken desk, four bags of mixed rubbish, and an old mattress. On paper, that sounds manageable.
Then the reality arrives. The mattress is awkward on the stairs. The desk won't fit through the doorway without dismantling. The bags contain mixed waste, so the disposal stop needs extra sorting. By mid-afternoon, the back seat is covered in dust, the hallway is blocked, and the job is only half done.
After a quick rethink, the homeowner separates the items, checks which pieces need specialist disposal, and gets the bulky items handled in a more suitable way. The room is cleared properly, with less strain and less damage. The lesson is simple: the expensive part was not the rubbish itself. It was the mismatch between the waste and the method.
We see this pattern often with furniture clearance, sofa removal, and house clearance jobs where people start with DIY and end up needing a more structured solution. Not because they did anything silly, just because the scale changed once the work began.
Practical Checklist
Use this quick checklist before you start. It helps more than people expect.
- Have you sorted waste by type?
- Do you know roughly how much there is?
- Have you checked access, stairs, parking, and opening times?
- Is your vehicle suitable for the load?
- Have you confirmed any specialist disposal needs?
- Do you have gloves, strong bags, and loading equipment?
- Are you clear on where the waste will go?
- Have you allowed time for loading and unloading properly?
- Have you separated anything reusable or valuable?
- Will the job still make sense if it takes longer than expected?
If you can tick most of those off, you are in good shape. If several are uncertain, it may be worth stepping back and comparing the options before you begin.
Conclusion
DIY rubbish removal can save money, but only when the job is small, simple, and properly planned. The most common mistakes are not dramatic ones. They are the quiet little slips: underestimating volume, mixing waste, choosing the wrong transport, forgetting disposal rules, and overlooking the true cost of your own time.
The good news? Most of those mistakes are easy to avoid once you slow down and look at the job properly. Sort first, lift safely, use the right disposal route, and be honest about when the project is bigger than it looks. That shift alone can make a huge difference.
If you want less stress, fewer trips, and a better chance of getting the job done first time, it pays to compare DIY with a professional option before you start dragging bags down the path. Get a free quote today and see how much you can save.
And if all else fails, remember this: rubbish is only rubbish when you've spent all day moving it twice.
Frequently Asked Questions
What is the most expensive DIY rubbish removal mistake?
The most expensive mistake is usually underestimating the amount or type of waste. That leads to too many trips, the wrong vehicle, or disposal fees you did not budget for. Mixed waste can also push costs up fast.
Is DIY rubbish removal actually cheaper than hiring a service?
Sometimes, yes - but usually only for small, light, well-sorted loads. Once you add time, fuel, parking, hire fees, and disposal costs, the savings can shrink quickly. For bulky or mixed waste, a service is often better value.
What waste types are hardest to handle on your own?
Bulky furniture, mattresses, fridges, old appliances, garden waste mixed with soil, and building debris are the awkward ones. They take up space, are heavy to move, and often need special handling or disposal.
How do I know if my rubbish is too much for DIY?
If the waste fills a room, needs more than one vehicle load, or involves heavy lifting down stairs, it is probably beyond the "quick DIY" stage. If you are hesitating, that is often a sign the job needs a better plan.
Can I put mixed rubbish in one load?
You can transport mixed rubbish, but it may not be the most efficient or cheapest option. Separating waste by type usually makes disposal easier and can reduce time and fees. It also helps with recycling.
What tools do I need for basic rubbish removal?
At minimum, you will want strong rubbish sacks, gloves, and a way to move heavy items safely. For bigger jobs, a sack trolley, tie-down straps, and protective wrap can make a big difference.
Are there legal risks with DIY rubbish removal?
There can be, especially if waste is dumped incorrectly or handed to the wrong collector. The safest approach is to use a legitimate disposal route and keep things documented where needed. That matters more for business and property work.
Should I remove rubbish myself or use a specialist service?
Use DIY for small, manageable jobs where you have time and safe access. Use a specialist service for bulky items, large clearances, awkward access, or when you want the work finished quickly without the faff.
What is the easiest way to avoid loading mistakes?
Sort the waste before touching the vehicle. Load heavy items first, keep fragile items protected, and secure everything so it cannot shift. Rushed loading causes damage, and damaged waste is somehow always more annoying.
How can I reduce the cost of rubbish removal overall?
Separate recyclable and reusable items, avoid unnecessary trips, choose the right disposal method, and do a proper volume check before starting. For larger clear-outs, comparing DIY with a professional collection is often the smartest move.
Is it worth trying to sell or donate items before removing them?
Yes, if the items are clean, usable, and not too much trouble to move. That can reduce disposal volume and sometimes save a surprising amount. Just do not let the donation pile become another clutter pile.
What should I do with old furniture or broken appliances?
Check whether they need separate disposal. Furniture, sofas, mattresses, and appliances often have dedicated collection routes. If you are not sure, it is safer to treat them as special items rather than forcing them into a general waste plan.
How far in advance should I plan a DIY clearance?
For a small job, a day or two may be enough. For a bigger clear-out, give yourself time to sort items, gather equipment, and confirm disposal arrangements. The more complex the job, the more planning saves you from stress later.